Locking down private services with Cloudflare Access
Cloudflare’s biggest strength is how dead simple it makes DNS management and automatic SSL certificates. Anyone who’s been surprised by an expired Let’s Encrypt cert on a Saturday evening knows the pain of constant renewals. Cloudflare takes that busywork off your plate entirely and issues valid certificates for all managed domains automatically. So naturally, the idea of routing internal, private services through Cloudflare to get that same convenience is pretty tempting.
In my infrastructure, almost every private service has its own subdomain: NAS, Vault, AdGuard, Grafana, Portainer. Everything runs through Cloudflare. I covered how I built that with Docker Stacks and Cloudflare Tunnels in part 2 of my homelab series. It saves me from certificate management and gives me secure access from anywhere. The remaining question is how to keep these services from being wide open to the entire internet. That is what Cloudflare Access handles.
The path to Cloudflare: no open ports
Most of my services run in Docker containers on a home server. To connect them to Cloudflare I use Cloudflare Tunnels. Traffic flows from the inside out to Cloudflare, so you don’t need to open any ports on your router. Fewer open ports mean less attack surface.
All traffic flows through this tunnel, and access control happens in the Cloudflare Access dashboard.
You create a tunnel in the Cloudflare Zero Trust dashboard under Networks > Tunnels > Create a tunnel, and configure the cloudflared service there. You then get a token to use in your Docker setup with the cloudflare/cloudflared:latest image.
For the container, the network configuration matters. There are two options:
- Host network: the path of least resistance. The container runs on the host network with direct access to all local services. Easy to set up, but a compromised tunnel could in theory reach your entire system.
- Dedicated Docker network: the more careful approach. You create a dedicated Docker network and put only the relevant private services and the
cloudflaredcontainer in it. That isolates the tunnel so it only talks to the services that should be exposed.
Configuring tunnel routes
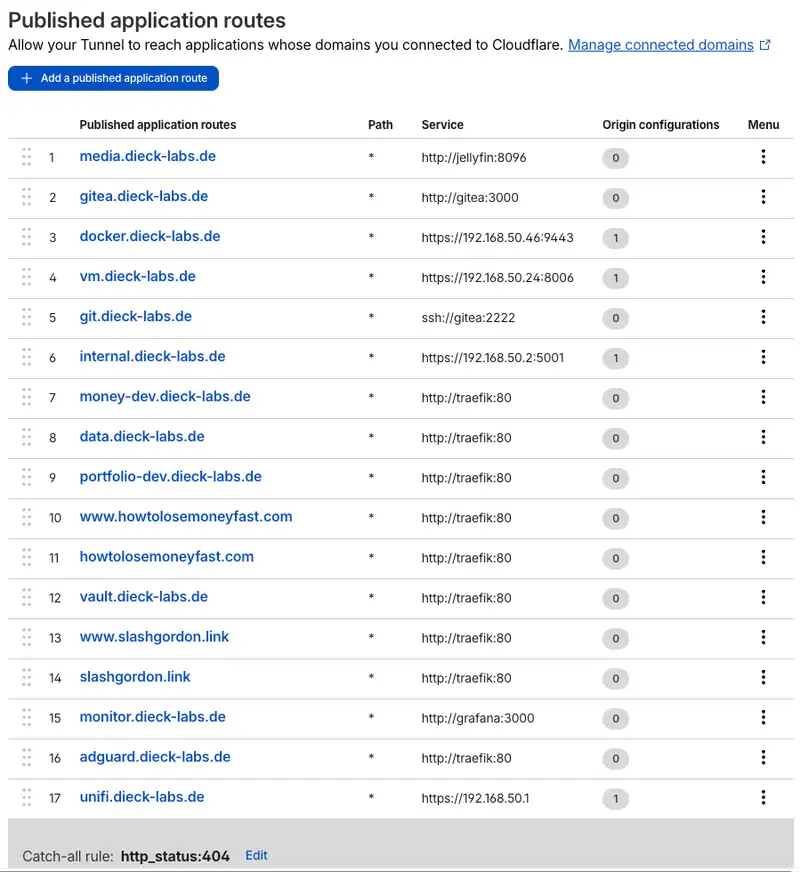
Once the tunnel is up, you define routes: which public subdomain points to which internal service. nas.example.com routes to your NAS IP, grafana.example.com lands at the corresponding container. Cloudflare creates the matching DNS records automatically.
If you’re pointing to another Docker container on the same network, you just need the container’s hostname and port. Docker resolves internal DNS itself, so the target containers don’t even need their ports mapped to the host.
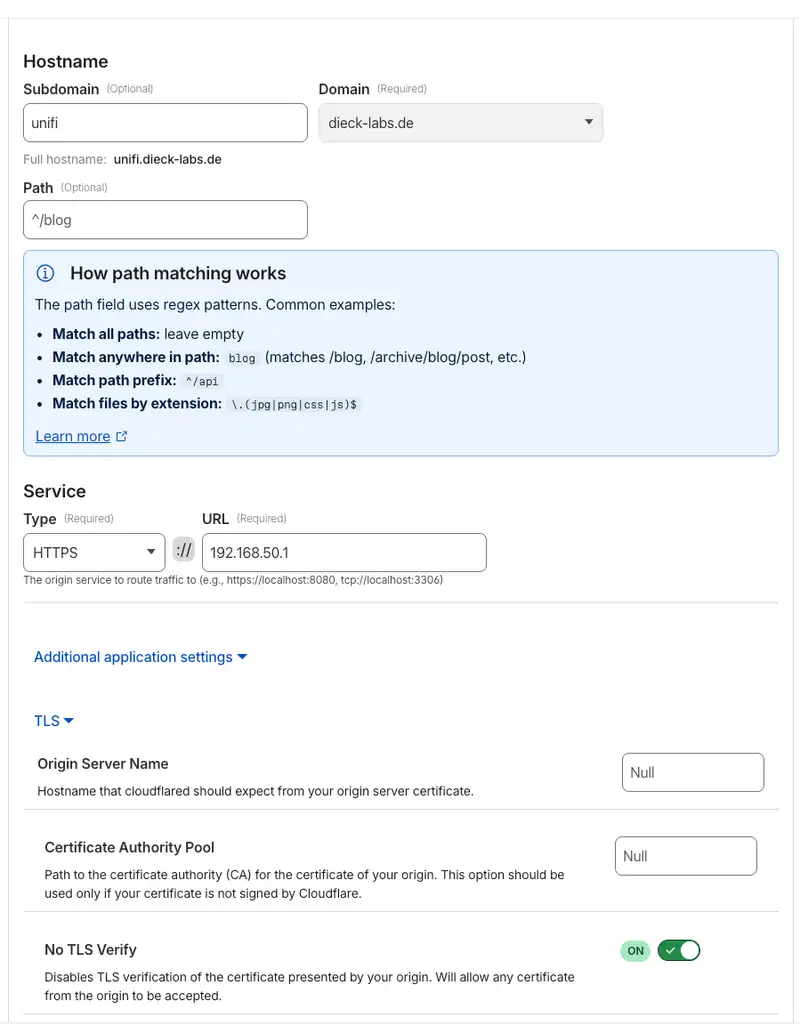
A common pitfall: when routing to a NAS or a web frontend that strictly enforces HTTPS, you often hit a 502 Bad Gateway, caused by a failed TLS handshake between Cloudflare and your internal service. The fix is to enable No TLS Verify in the tunnel settings under Additional application settings > TLS. Cloudflare then ignores the failed handshake from the self-signed internal certificate and the connection works.
One tip: for my websites I have a single service configured in the tunnel, http://traefik:80. Traefik is my reverse proxy. Cloudflare passes every request to Traefik, and Traefik does the internal routing by subdomain, so I don’t have to touch the Cloudflare tunnel for every new container. My Traefik configuration is in my GitHub repo if you want a reference.
Cloudflare Access policies
I used to handle access control with Security Rules in the domain dashboard, but Zero Trust is more comfortable.
The tunnel is up and the services are reachable, so now they need locking down again.
Create a new Application under Access > Applications and call it “Home”. For the Application URL I used *.dieck-labs.de, since I run a separate domain for my home infrastructure, and the wildcard covers all subdomains at once.
Then define the policies:
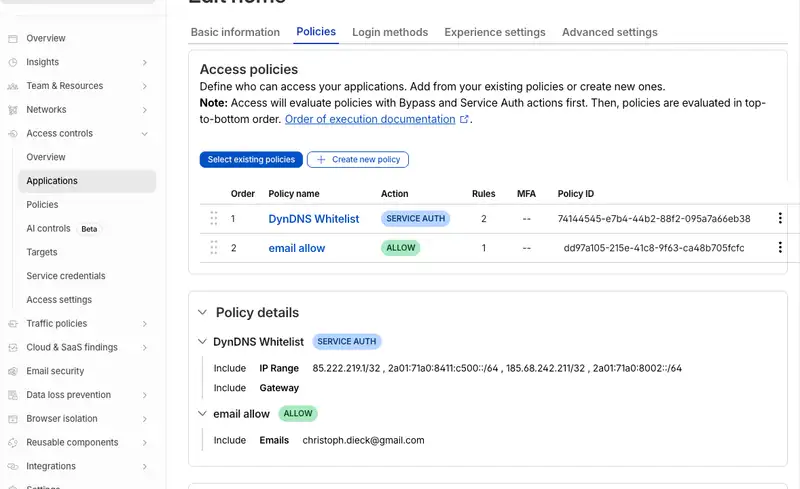
- Remote access (Allow): so I can reach my services on the go, I set up an Allow rule with “Emails” as the selector and my personal address. Family members who need the Jellyfin server go here too. When they visit the page, they get a login screen, enter their email, receive a one-time code, and they’re in.
- Access from home (Bypass): at home you don’t want a PIN every time. A Bypass rule handles that. You could enter IP ranges or your public IP, but with a dynamic IP and no DynDNS that gets annoying fast. Instead, pick Gateway as the selector. Combined with the Cloudflare WARP client (the 1.1.1.1 app) on your devices, Cloudflare recognizes you as authorized, and access from your home network or with an active WARP client works without a PIN.
Securing device enrollment
Finally, make sure not just any device can join your organization. Under Settings > WARP Client > Device enrollment permissions (or, depending on the dashboard version, Team & Resources > Devices) you define a rule: click Manage or Add a rule, set the rule name to something like “My Devices”, set the selector to Emails, and enter your email address or addresses.
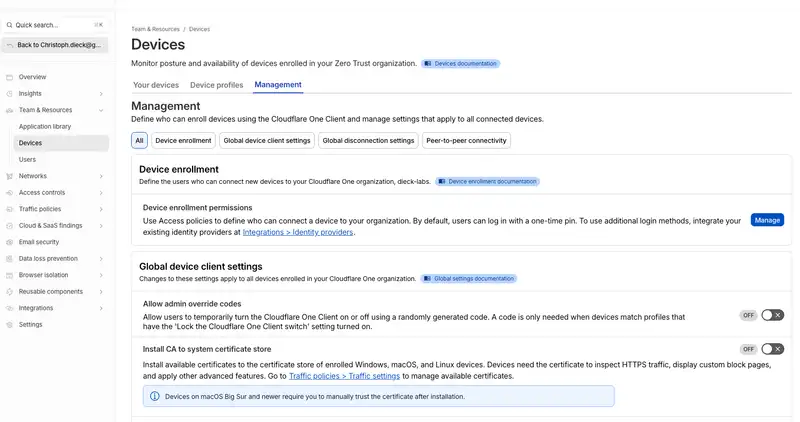
I also recommend enabling “Device authentication identity” in the Teams and Apps settings.
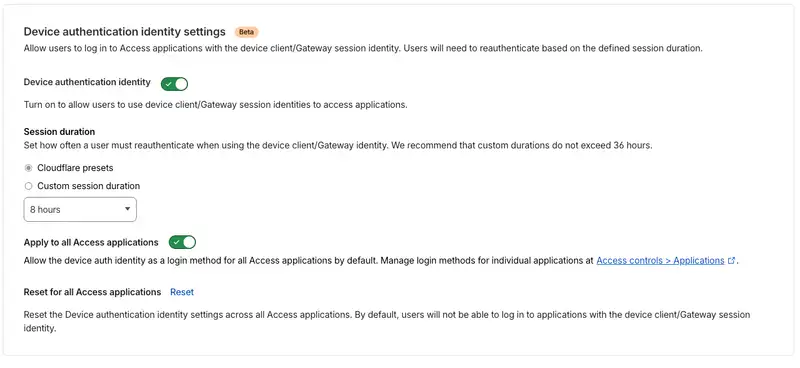
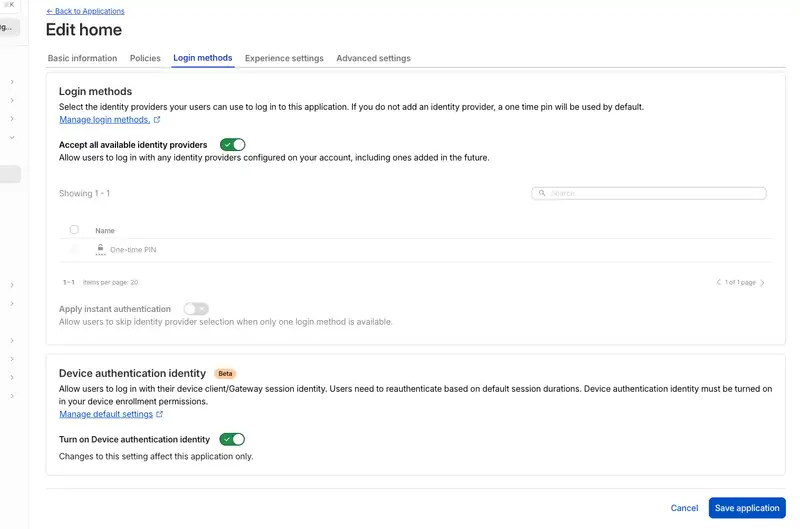
That completes the setup. Your services sit behind Cloudflare, reachable from outside only by authorized users, while the bypass rule keeps access from home free of constant logins.